The User Interface |

|

|

|

|
The User Interface |
|
|
|
|
The Astra Schedule application initially opens to your home page, or personal portal. This portal page may be customized to include certain application elements and shortcuts that are relevant to you. Tabs and links are provided for easy navigation to other areas of the application. The tabs and other links available are dependent on your level of access. Click on a tab to reveal additional options, features and tools appropriate to the area you have selected.
With the exception of the Calendars option, each tab reveals a list of possible choices for viewing information, performing tasks, and configuring data relative to a general area of the application. A brief description is provided for each of the options. Click on a link from the tab page to interact with a specific option. The links are mirrored across the top of the page as well. You may access these areas at any time to jump to a new option from a different page within the tab.
In many cases the first screen you will see after clicking on an option from within a tab is a page that shows a list of items and some details in a panel on the right and search, filter and help options in panels on the left. Use the search and filter options to narrow the list results or find a specific record.
To view more information about a specific record on the list, click directly on the record name link. In many cases you can hover over an activity or icon to see a summary description. Examples include activities on the calendar, references to rooms and resources, and anywhere a hover icon is displayed next to the name of an item or activity.
![]() NOTE: You may collapse the filter panel on a list page to make more room for the list results or task. Simply click on the panel arrow icon in the upper right corner of a panel to hide it. Click again to show the panel.
NOTE: You may collapse the filter panel on a list page to make more room for the list results or task. Simply click on the panel arrow icon in the upper right corner of a panel to hide it. Click again to show the panel.
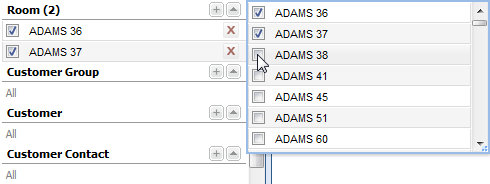
The list page filter options will vary depending on the type of record being displayed. Many filters allow for multiple choices to be selected.
To set a filter for a list page, click the + button to display the possible choices.
Check the box next to each item you would like to include in your filter. Notice that the items are added automatically to the filter list.
Click the Search button to update the list page.
You may remove the filter item temporarily by removing the check mark while on the list page, or remove it permanently (until the next time you set the filter) by clicking the X button.
Unless a default saved filter is configured, the last filter used is remembered for the next time you visit the page.
Favorite filters may be saved on most list pages as well as the room and resource scheduling tools for both sections and events.
The saved filter toolbar can be found at the bottom of each filter panel where applicable.
![]()
When filter selections are made in the filter panel of a list, the saved filter tool will display "custom" to indicate that manual filtering is being applied. To save the filter selections for reuse at a later time, perform the following:
1.Select the filter options you would like to save in the filter panel.
2.Click the save button in the saved filter toolbar.
3.Enter a name for your saved filter.
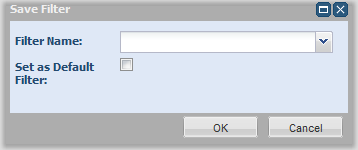
4.Place a check in the box labeled "Set as Default Filter" if you would like the saved filter to be applied by default when visiting the page.
![]() NOTE: If no default is specified, filtered lists will remember the last filter applied when returning to the page.
NOTE: If no default is specified, filtered lists will remember the last filter applied when returning to the page.
5.Click OK to save the filter.
The saved filter is now available for selection using the drop-down menu on the saved filter toolbar.
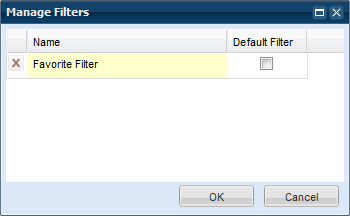
You may edit or remove saved filters using the manage filters option on the saved filter toolbar.
Depending on the data and your filter settings, the list may include a number of pages. You may configure the number of records displayed per page as well as navigate the various pages using the pagination options at the bottom of the list.
Often you can click on the column labels on the list page to change the way the list is sorted. Click again to reverse the sort order.
Columns in a list page may be rearranged as desired. To move a column, click and drag the column header to a new position. When the arrows appear between other columns in the correct position, release the mouse button to drop the column into its new position.

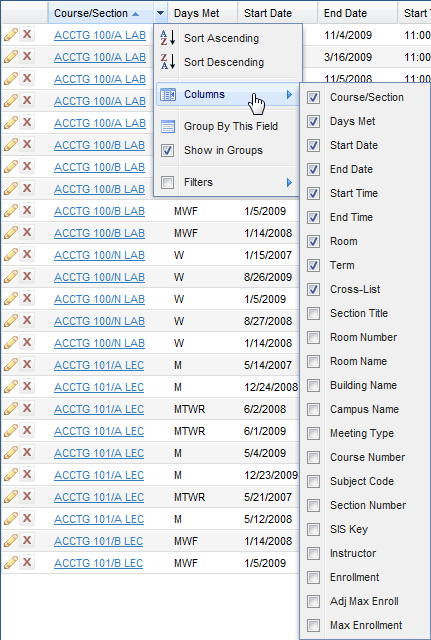
The columns that are displayed on a given list page may be changed as well. To customize the display, click on the right arrow on any column in the list and choose the Columns option.
All of the available column options for the record type being viewed are displayed. Place or remove a check mark to add or remove columns from the list page.
![]() NOTE: A user's filters and customizations to list pages are remembered when returning to the same list.
NOTE: A user's filters and customizations to list pages are remembered when returning to the same list.
Page url: ?introduction_theuserinterface.htm

