|
Implementation and Installation Notes |

|

|

|

|
|
Implementation and Installation Notes |
|
|
|
|
The Jenzabar CX interface can be implemented either with or without a CX intermediate table. When the intermediate table is used, Astra Schedule will import section data from the intermediate table and export room assignments directly back to the appropriate CX tables. When using the intermediate table, the import process should be configured using the JenzabarCXSectionImportFromStagingTable.xml configuration file. When the intermediate table is NOT being used, both imports and exports are performed directly against the primary CX tables, and the JenzabarCXSectionImportFromCXTables.xml configuration file should be used. Information regarding the table data utilized by these files is provided below in Data Access.
Astra Schedule utilizes an ODBC connection to the Jenzabar CX Informix database to import and export data. Before installing Astra Schedule, the following steps must be performed:
1.Create an Informix database user for the Astra Schedule application.
2.Install an Informix ODBC driver on the server hosting the Astra application.
3.Configure a DSN (Data Source Name) to the Informix database using the Windows ODBC administrator. (Control Panel/Administrative Tools/Data Sources)
4.Verify the connection.
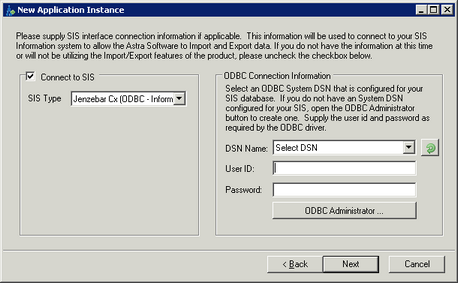
5.Install Astra Schedule. During the installation process, you will select Jenzabar CX as the SIS connection and provide the DSN, User ID, and Password.
Page url: ?jenzabarcxsisinterfaceaddendum_1.htm

