Uninstall Astra Schedule |

|

|

|

|
Uninstall Astra Schedule |
|
|
|
|
Uninstall Astra Schedule Version VII
Delete the Astra website in IIS
1.Open the Internet Information Services Manager.
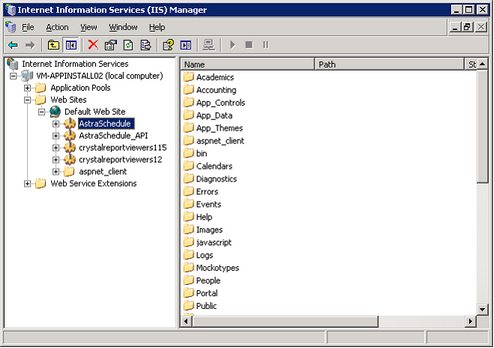
2.Select and delete the Astra Schedule website created in IIS during the installation.
3.Select and delete the Astra Schedule API website created in IIS during the installation.
4.Close the IIS Manager.
Stop Astra Task Services
1.Astra Task Services are created during installation. To make sure these services are stopped, open the Windows Services panel.
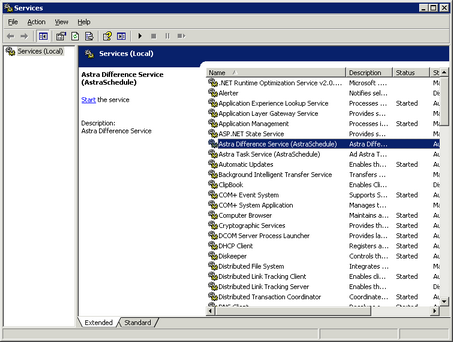
2.Find the Astra Difference Service and Astra Task Service on the services list. If this services are started, then right-click on the services and choose “Stop”.
Remove Astra Task Services
1.To remove the Astra Task Service from the services list, click Start > Run.
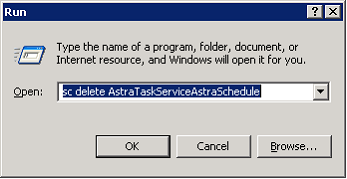
2.Enter “sc delete <Astra Service Name>”, using the actual name of the installed service. The default would be as shown above. Click OK. The Run window will disappear.
3.On the Windows Services panel, click Action > Refresh. The Astra Task Service will be removed from the list.
Delete the Ad Astra directory
1.Browse to the location of your Astra installation folder. The default path is C:\Program Files\Ad Astra.
2.Select and delete the Ad Astra folder to remove the remaining application files.
Run the Control Panel Uninstall
1.Launch the Windows Control Panel and open Add/Remove Programs.
2.Find and remove the Astra Schedule Control Panel. This will remove the application registry entry and the Start Menu shortcuts.
Page url: ?uninstall_astra_schedule.htm

