Install Astra Schedule |

|

|

|

|
Install Astra Schedule |
|
|
|
|
•Database Server
•Server Name – server hosting the Astra MSSQL Database
•SA user name and password
•TCP Port
•SIS Connection Information (if applicable)
•See SIS Addenda for vendor-specific connection settings
•Database Server
•Host/IP – server hosting the Astra Oracle Database
•Username and Password – system administrator user name and password for sysdba
•Oracle user with sysdba rights – can create schemas
•TCP Port
•Service Name – Service_Name – db server sid
•TNS Name – Database Alias
•SIS Connection Information (if applicable)
•See SIS Addenda for vendor-specific connection settings
•Verify or create a TNS entry to the Oracle database instance
•If the defaults were retained during the Oracle 11g client installation, the path to the tnsnames.ora file should be c:\app\*username*\product\11.1.0\client_1\Network\Admin.
A tnsnames.ora template file can be copied from the “Sample” directory and pasted into the root of “Admin”.
To add a new TNS entry, perform the following:
1.Open the tnsnames.ora file with Notepad.
2.Edit the existing sample TNS entry or add a new entry with the following syntax:
<data source alias> =
(DESCRIPTION =
(ADDRESS = (PROTOCOL = TCP)(HOST = <hostname or IP>)(PORT = <port>))
(CONNECT_DATA =
(SERVER = DEDICATED)
(SERVICE_NAME = <database service name>)
)
)
Replace "<data source alias>" with an alias of your choosing
Replace "<hostname or IP>" with your Oracle server host name
Replace "<port>" with your Oracle port (1521 is the default Oracle port)
Replace "<database service name>" with your Oracle service name
3.Save changes to the file.
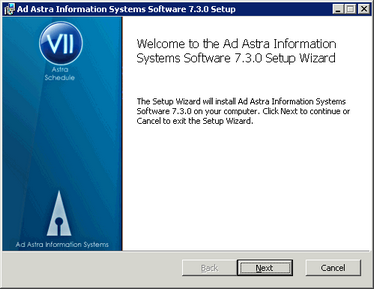
1.Launch the AstraSchedule.7.x.x.x.msi file and click Next on the Welcome screen to continue.
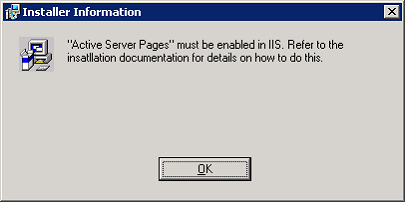
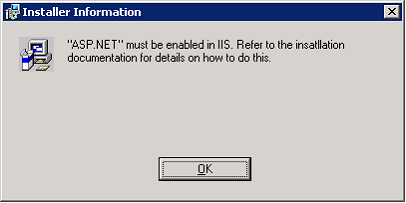
NOTE: The Astra Schedule application requires that Active Server Pages and ASP.NET be registered and allowed in IIS. If this is not the case, you will immediately receive one or the other of the following messages:
To correct this issue, perform the following steps to re-install the .net framework and configure the IIS settings:
a.Click OK.
b.Click OK.
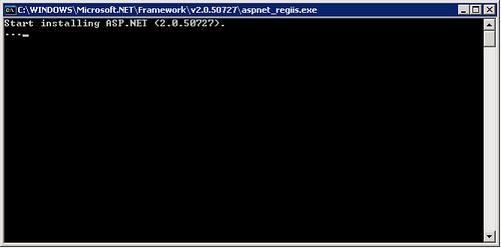
c.Execute the following command using Start>Run or the Command prompt:
C:\WINDOWS\Microsoft.NET\Framework\v2.0.50727\aspnet_regiis.exe –i
ASP.NET will be reinstalled.
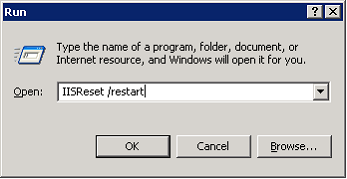
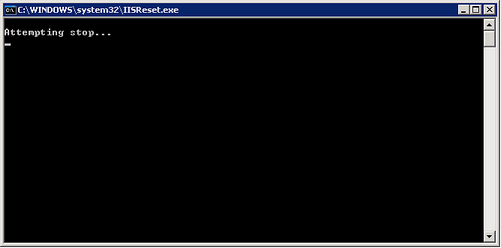
d.Go to Start > Run and run the command shown below to restart IIS.
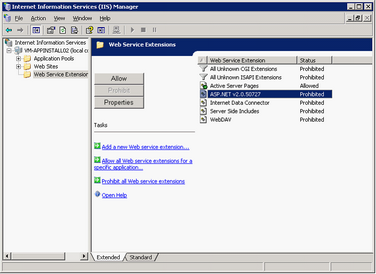
e.Open the IIS Manager and click on the Web Service Extensions option.
f.Select the ASP.NET extension and click the Allow button.
g.If necessary, also select and allow Active Server Pages.
h.Re-run the Astra Schedule installer.
|
2.Place a check in the box to accept the license agreement and click Next to continue.

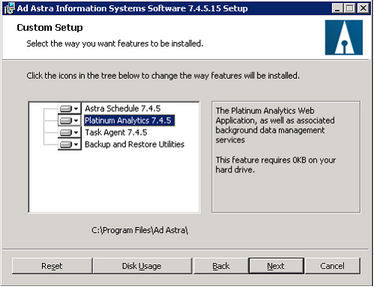
3.Confirm the components to be installed and the destination folder and click Next to continue.
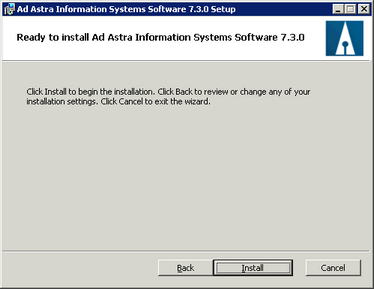
4.Click Install to deploy the application files and the installation control panel.
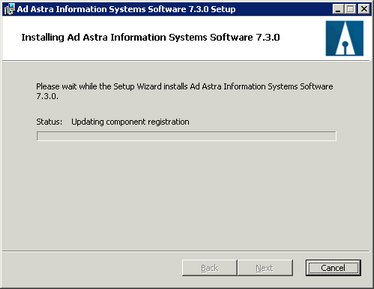
5.Wait while the installation takes place, then click Finish to close the installer and launch the Control Panel.
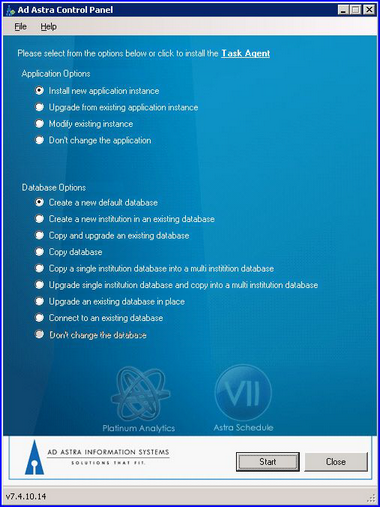
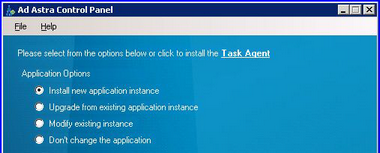
6.Select a desired Application and Database option then click Start to begin the installation configuration process.
For a new installation of the both the application and database, select "Install new application instance" from the Application options, and "Create a new default database" from the Database options.
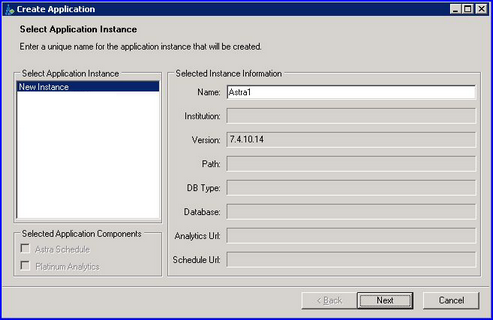
7.Enter a unique instance name for this installation of Astra Schedule, or keep the default instance name.
Click Next to continue.
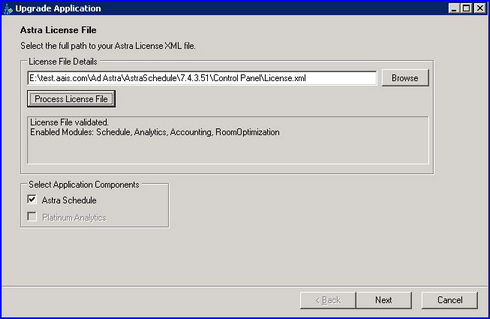
8.Click Browse to select the application license file.
![]() NOTE: License files are distributed by Astra Schedule implementation or support staff during initial installation.
NOTE: License files are distributed by Astra Schedule implementation or support staff during initial installation.
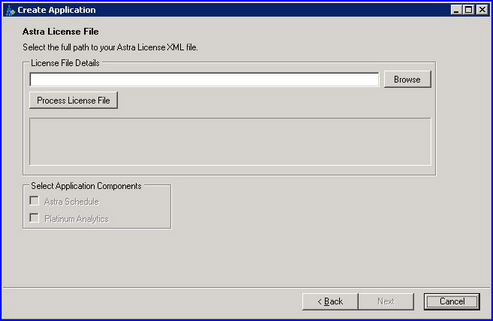
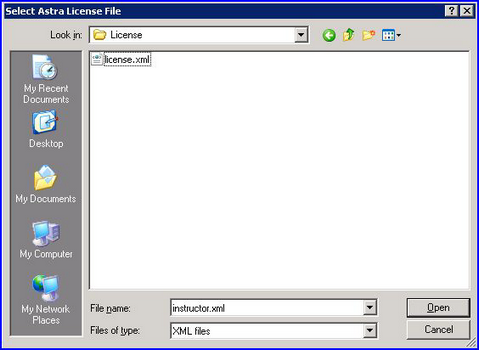
9.Select license file and click Open.
10.With file path displayed, click Process License File to validate license. Click Next to continue.
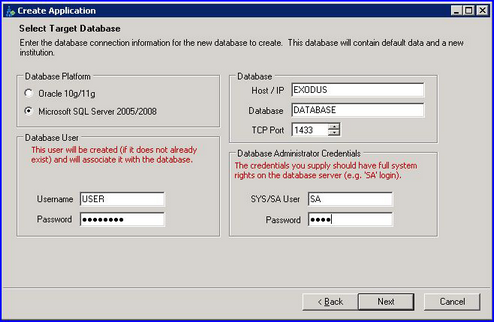
11.If using Oracle, skip to step 13. Otherwise, select the Microsoft SQL Server 2000/2005 radio button option and then enter the following information:
A username and password for Astra Schedule to use when creating and accessing the database. This becomes the Astra Schedule application's login for its database going forward.
The host name or IP address of the database server.
The MS SQL SA username.
The MS SQL SA password.
The MS SQL TCP port (this value will default to 1433).
Click Next to continue. The connection will be tested to make sure it is successful. If there is a problem with the connection an error message will appear.
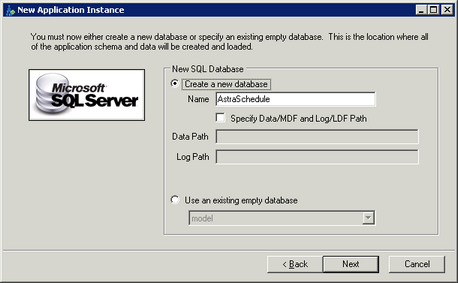
12.Select “Create a new database” if a new Astra Schedule default database should be created as part of the installation.
Enter a name to be used for the new database.
If the data and/or log files for the database should be written to custom locations, click the box to enable the path fields and provide the path(s) to their locations.
Select “Use an existing empty database” if the MS SQL database to be used for Astra Schedule already exists. The installation process will create the default tables and data in the database specified.
Click Next, and go to step 14. NOTE: If the database already exists or is already populated with tables (depending on selection), an error message will appear.
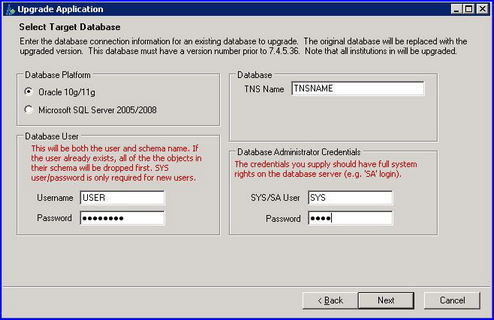
13.If using Oracle, select the Oracle 9i / 10g radio button option, and then enter the following information:
A username and password for Astra to use when creating and accessing the database. This becomes Astra's login for its database going forward.
 WARNING: If the username and password entered here already exist, the user and schema will be deleted along with any data. Do not enter an existing username and password unless it is your intention to delete it and recreate it from scratch.
Enter the TNS Name as configured in the TNSNames file.
Enter the Oracle SYS username.
Enter the Oracle SYS password.
Click Next to continue. The connection will be tested to make sure it is successful. If there is a problem with the connection, or if the database already exists, an error message will appear.
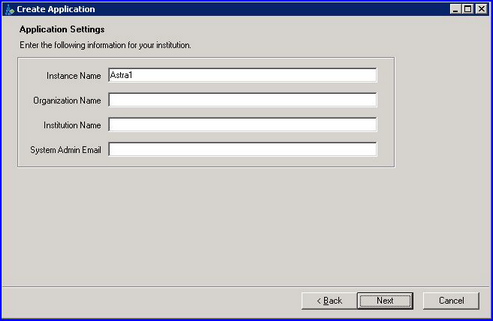
14.Enter the initial organization and institution names, and the initial system administrator email address. The initial organization and institution names are used to establish the base application and distinguish the institution data. The system administrator email address is the initial email address given to the default system admin login.
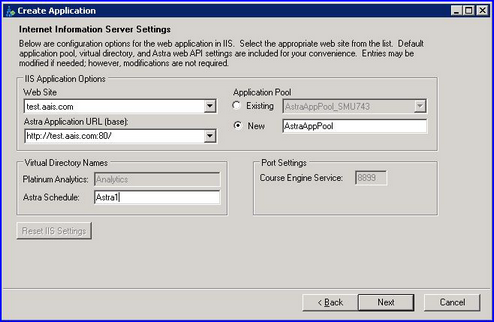
15.Internet Information Server Settings
IIS Application Options
Select the desired IIS web site from the drop down list.
The Astra Application URL will default based on the web site previously selected, but may be changed if desired.
Select an existing IIS app pool from the drop down list, or choose “New” and enter the name of a new app pool to be created. For an initial installation, it is recommended to select “New” and create an “AstraAppPool” to separate Astra Schedule in IIS and make identification easier.
Virtual Directory Names
Specify the virtual directory alias for the application(s) being installed. This directory name will be appended to the application's access URL.
Port Settings
Confirm that the default application ports are available. These may be changed if there is a port conflict that must be resolved.
Click Next to continue.
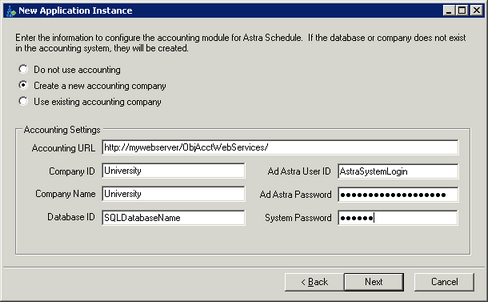
16.Accounting Module Setup
Enter the Accounting URL.
This value is the URL of the ObjAcct virtual directory created during the accounting server installation. Example: http://mywebserver/ObjAcctWebServices/
See Accounting Server Installation for more information.
Enter the Company ID.
This value is the unique company identifier used by ObjAcct. This value should be the Astra Schedule institution name. This is also used when you log in into the ObjAcct client application. Do not use demo or systemmanager.
Enter the Company Name.
This value can be the same as the Company ID unless a different name is desired.
Enter the Database ID
This value is the name of the ObjAcct application SQL database in which the new company (institution) should be created. This database is created during the accounting server installation.
Enter the Ad Astra User ID.
This value is the desired user id of the initial admin user that will be created for the ObjAcct company created for this Astra Schedule instance.
![]() NOTE: The admin login being created here is the login that will be used by the Astra Schedule system to communicate with the accounting system. This login should not be used to access the accounting system otherwise. Logging in to the accounting system as this user will disconnect Astra Schedule and create communication errors.
NOTE: The admin login being created here is the login that will be used by the Astra Schedule system to communicate with the accounting system. This login should not be used to access the accounting system otherwise. Logging in to the accounting system as this user will disconnect Astra Schedule and create communication errors.
Enter the Ad Astra Password.
This value is any valid password for the initial admin user being created.
![]() NOTE: The ObjAcct application requires that passwords be at least 6 characters. If the Astra Schedule system attempts to provide a password for either the system or a user that does not meet this requirement, the login will fail.
NOTE: The ObjAcct application requires that passwords be at least 6 characters. If the Astra Schedule system attempts to provide a password for either the system or a user that does not meet this requirement, the login will fail.
Enter the System Password.
This value is the ObjAcct suite system admin password. The default is abc123. Enter this value, or if the password has been changed since installation, enter the new password.
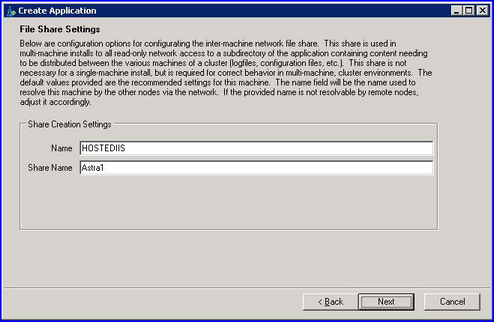
17.If performing a multi-machine install of application components, enter the server name and share name to be used for shared file access.
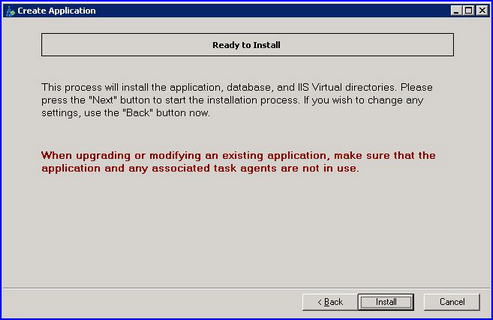
18.You are ready to install the application and database. Click Install to perform the installation.
 \
\
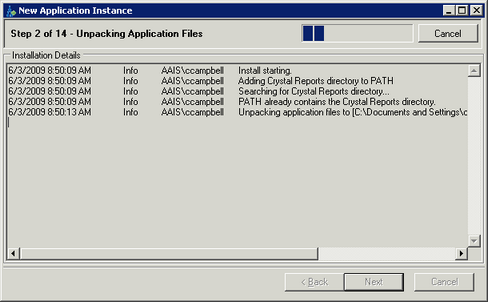
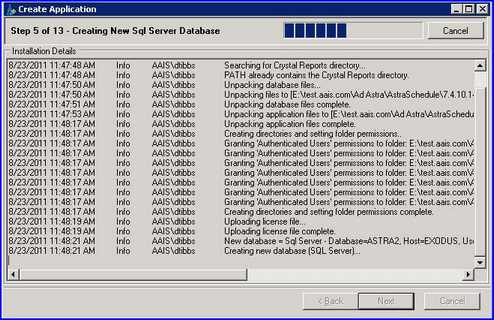
19.This step may take several minutes and will perform the following tasks:
Unpack files
Configure application
Configure IIS
Install services
Build database
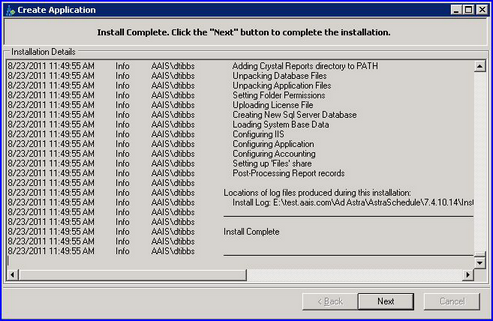
The control panel may encounter, log and correct errors during the database creation process. These errors are acceptable and should not interfere with a successful installation.
If, however, you receive the message that errors were encountered and the application installation does not complete, you can check the log file to investigate further.
To find the log files, browse to the following location:
C:\Program Files\Ad Astra\AstraSchedule\7.0.1\AstraCP.log for installation logging.
C:\Program Files\Ad Astra\AstraSchedule\7.0.1\AstraCP-DB.log for database creation logging.
When the installation is complete, click Next to continue.


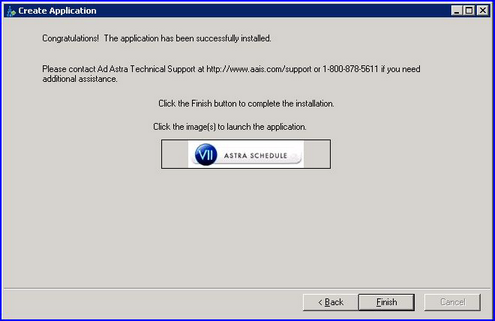
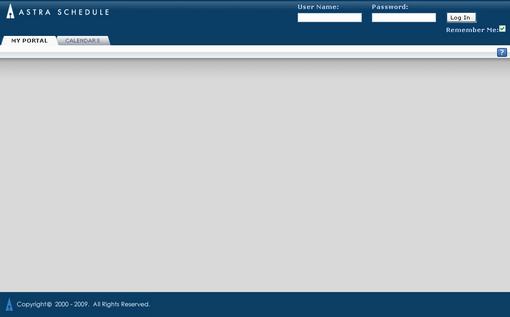
20.Click the VII Astra Schedule logo button to test the application. The guest portal page should be displayed.
The Astra Schedule Task Agent is a Windows service installed on the machine that is responsible for coordinating transactional processes with other systems (i.e. SIS integration) as well as performing scheduled tasks like report subscriptions, batch jobs, sandbox scheduling runs, and workflow notifications.
![]() NOTE: The Task Agent is a required component for proper functioning of the application. Features such as the room assignment optimizer, event workflow notifications, and section imports will not work without the Task Agent.
NOTE: The Task Agent is a required component for proper functioning of the application. Features such as the room assignment optimizer, event workflow notifications, and section imports will not work without the Task Agent.
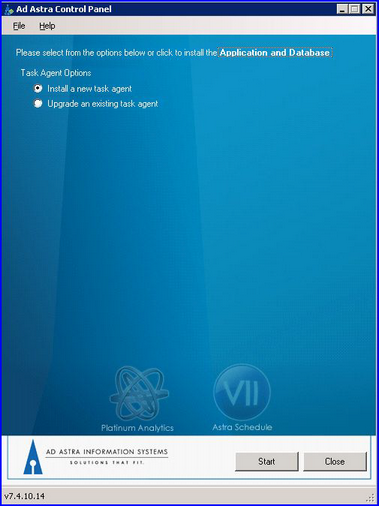
1.At the top of the Control Panel, click Task Agent.
2.Select the option to "Install a new task agent" and click Start.
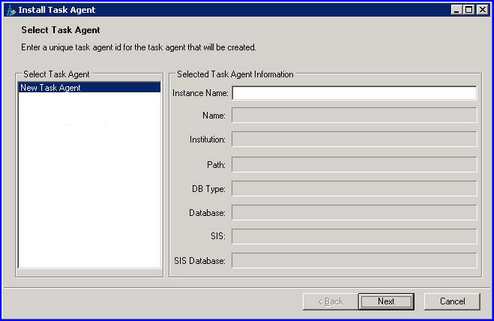
3.Enter the name of the Astra Schedule instance the task agent will be associated with and click Next to continue.
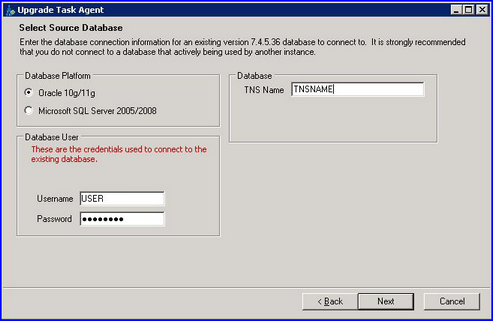
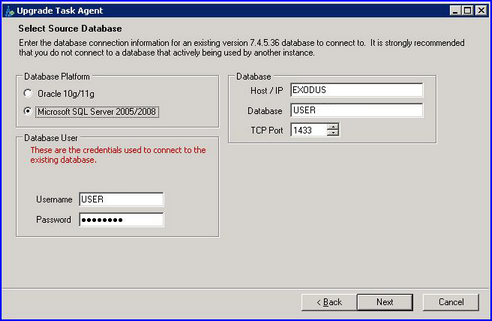
4.Select the applicable Astra Schedule application database platform and provide the login credentials for the application instance installed and click Next to continue.
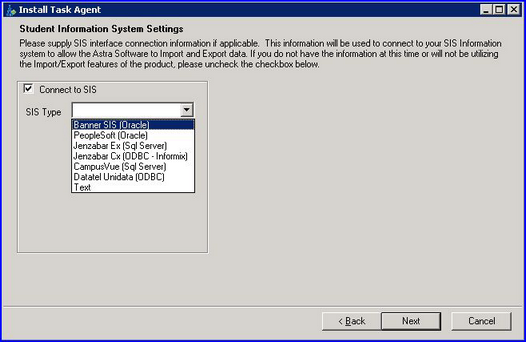
5.If using an Astra Schedule interface with a supported Student Information System, place a check in the box next to Connect to SIS and then select the SIS Type from the drop down list. The SIS Type selection will dictate which connection parameters are required. The connection settings will appear with the SIS Type selection.
See the applicable SIS Addendum for details on connecting to your SIS.
6.Specify the new task agent name to be used (typically the application instance name) and click Next to continue.
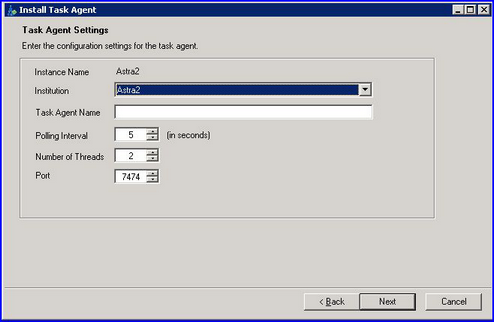
![]() NOTE: The Number of Threads setting (NumThreads column on the TaskAgents table) should be set to equal-to or less-than the number of processers allocated to the machine running the Astra Schedule application. This setting determines the number of jobs that can run simultaneously, including ATE imports and sandbox runs. Keep in mind that database performance issues can occur if the application server has more processors than the database server and is configured to run many jobs at once (i.e. running an 8-core core app server and 8 jobs against a 4-core database server).
NOTE: The Number of Threads setting (NumThreads column on the TaskAgents table) should be set to equal-to or less-than the number of processers allocated to the machine running the Astra Schedule application. This setting determines the number of jobs that can run simultaneously, including ATE imports and sandbox runs. Keep in mind that database performance issues can occur if the application server has more processors than the database server and is configured to run many jobs at once (i.e. running an 8-core core app server and 8 jobs against a 4-core database server).
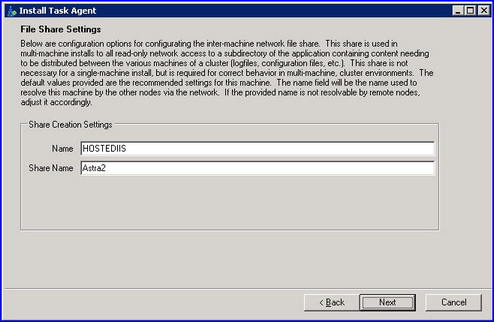
7.If performing a multi-machine install of application components, enter the server name and share name to be used for shared file access. Click Next to continue.
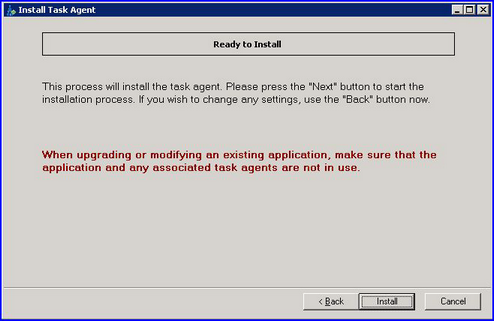
8.Click Install.
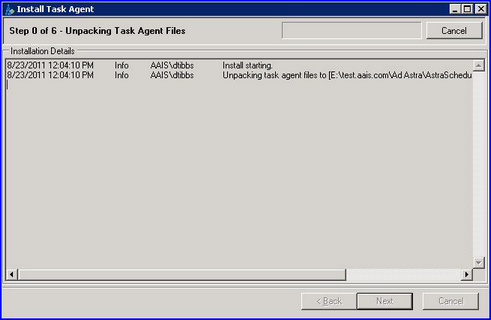
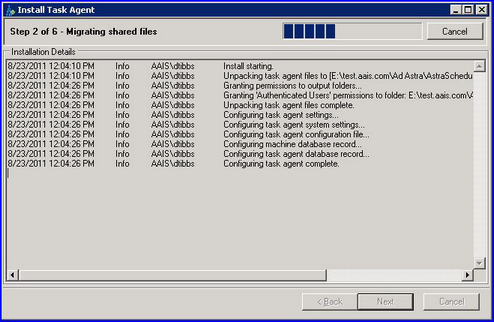
9.Wait while the task agent is installed and then click Next to continue.
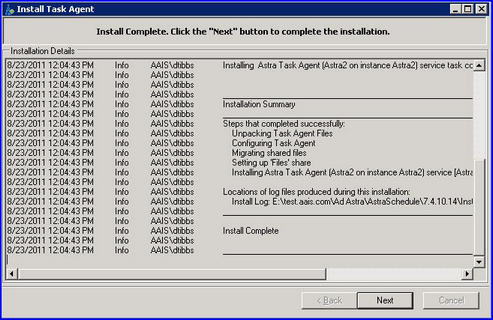
10.Click Finish when completed.
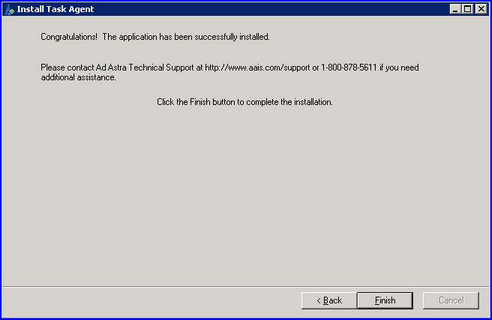
Congratulations – you’re finished!
You can now log in to the application using the default system administrator user name of "sysadmin" and password of "apple". The system will prompt you to change the password of this initial user.
Page url: ?installastraschedule.htm