Install the Oracle 11g Client |

|

|

|

|
Install the Oracle 11g Client |
|
|
|
|
Install Oracle 11g client (version 11.1.0.6.20)
To install the Oracle 11g client, perform the following:
1.Download and unzip ODTwithODAC1110620.zip.
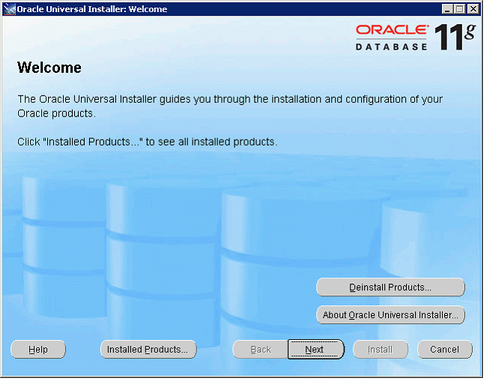
2.Launch the Setup.exe file.
3.Click Next to continue.
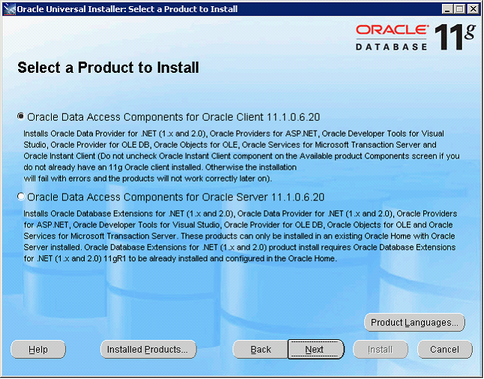
4.Select the option to install Oracle Data Access Components for Oracle Client. Click Next to continue.

5.Retain the default paths if they appear as shown here with references to 11g.
If the Oracle 10g client is already installed, the software location path must be changed so it doesn’t overwrite the existing client files. The Oracle Home directory path will need to be edited as well. See step l for further instructions. Click Next to continue.
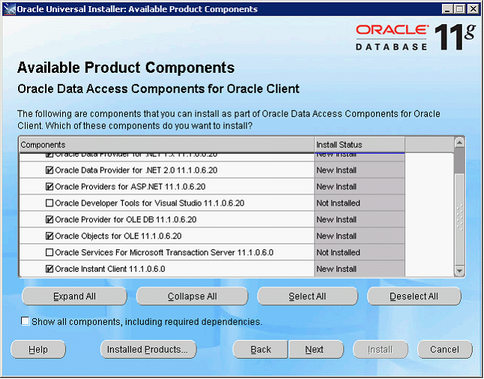
6.Uncheck "Oracle Developer Tools for Visual Studio" and "Oracle Services for Microsoft Transaction Server". Click Next to continue.
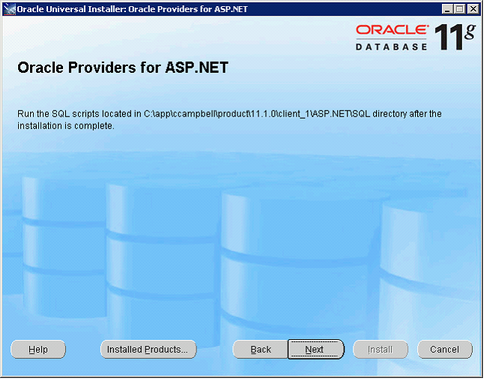
7.Ignore the prompt about running SQL scripts. Click Next to continue.

8.Click Install to start the installation.
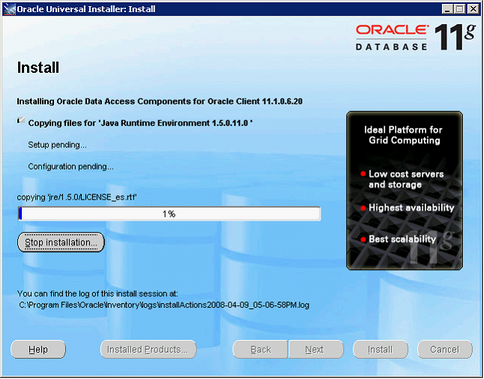
9.The installation progress is displayed until finished.
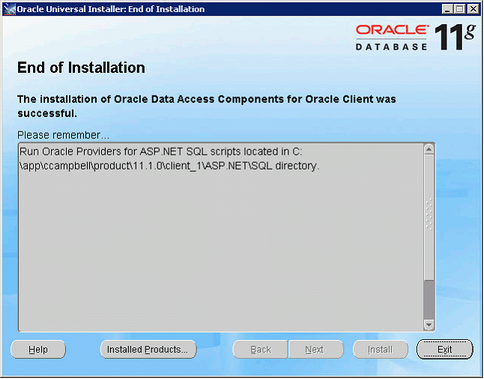
10.Click Exit to end the installation process.

11.Click Yes to confirm.
12.If the 11g client was installed in addition to an existing Oracle client, the Oracle Home directory path must be edited.
Right click on My Computer
Choose Properties
Click the Advanced tab
Click the Environment Variables button
Find Oracle_Home on the list and click to edit
Edit the Variable Value path to reflect the 11g client root directory (“client_1” is the default root directory)
Page url: ?install_the_oracle_11g_client.htm

